Publishing to the Web
Deploy your Jupyter Book to GitHub Pages, Curvenote, Netlify, and many other services.
GitHub Pages
Jupyter Book ships with support for generating the necessary configuration for deploying to GitHub Pages using GitHub Actions. Simply run the following command, and answer the prompted questions!
1 2 3 4 5 6 7 8 9 10 11 12 13 14 15 16 17 18 19 20$ jupyter book init --gh-pages 📝 Creating a GitHub Action to deploy your MyST Site ? What branch would you like to deploy from? main ? What would you like to call the action? deploy.yml 🎉 GitHub Action is configured: .github/workflows/deploy.yml ✅ Next Steps 1. Navigate to your GitHub Pages settings 2. Enable GitHub Pages 3. Use GitHub Actions as the source 4. Push these changes (and/or merge to main) 5. Look for a new action to start 6. Once the action completes, your site should be deployed on your https://{{ organization }}.github.io/{{ repo }} domain 7. 🎉 Celebrate and tell us about your site on Twitter or Mastodon! 🐦 🐘
In order for GitHub to use this configuration, you must follow the “Next Steps” above, namely:
Enable GitHub Pages, and set the source to GitHub Actions (see Figure 1)
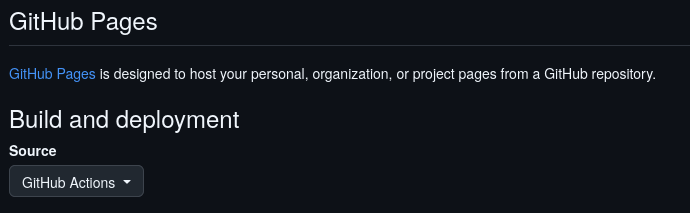
Figure 1:Screenshot of the GitHub Pages configuration, where the important Source option resides.
Add the generated
.github/workflows/XXX.yml(highlighted in Program 1) to your list of tracked files (e.g. withgit add .github/workflows/XXX.yml).Commit the changes.
Push them to GitHub.